Deborah R. Fowler
Houdini Looping - Copy Options
Posted Sept 1 2022
Updated Sept 1 2022
This page focuses on a step by step description of the copyOptions19.5.hiplc file. For a description of the for-each nodes see Houdini For-each
Suppose you want to create a grid of tiles 6 x 5 (these can be generalize easily - that is another topic - Houdini Parameter Interface.
Download the file to see the finished results, or try to create and use only as a reference.
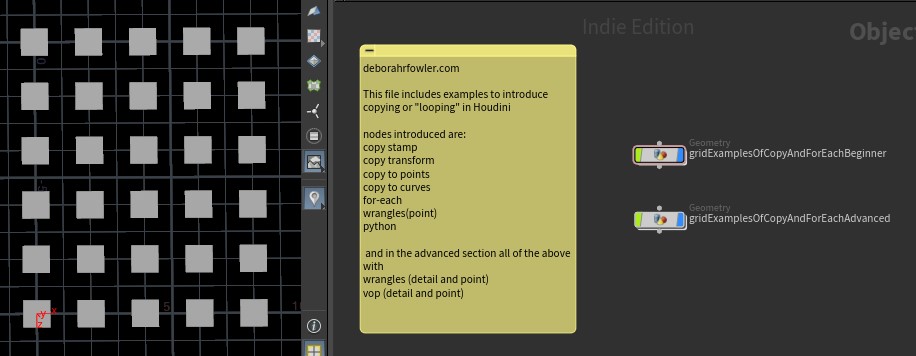
CONTEXT NOTE: The copy stamp node has been a very versatile node (which I refer to as the copy node) and was a superset of the copy transform and copy to points nodes. Functionality was added to the copy to points node that allows variants (explained below) and the copy to curves node was introduced. In addition, for-each, wrangles (vex) and python appear. Further distinctions are made between implicit and explicit loops with regard to vex and vops but that is a top for more advanced users. For beginning users, focus on the container with postfix Beginner.
As of Houdini 19.5, the copy stamp node is no longer available from the tab menu. The documentation recommends using for-each instead (https://www.sidefx.com/docs/houdini/copy/stamping)
Yes, you should use the for-each instead, yes copy stamp is not as efficient for variants ... but should you ever need it for a reason it is still around until it is fully deprecated via textport (Technical Desktop) - create a geo node and then type in textport: opcf /obj/geo1; opadd copy
Below we will start with the copy transform node and work our way left to right in the container for Beginners.
Note that all the examples produce precisely the same result - many ways to accomplish a task in Houdini.
copy transform - if you recall from your introductory programming class, if you were to do this in code the easiest way would be to have a nested loop, copy 5 boxes (columns) and then repeat each of those 6 time (rows). Copy transform copies based on the "running total". That is, for a row the first is copied 0 units, the next 2 units, the next 4 units and so on. We then used a -2 in the second copy to copy up (note the red origin in the bottom left corner). So we have a copy of a copy (first one creates a row of 5 tiles, next creates 6 of those.
Really, a copy node is performing a looping behavior. I call that an implicit loop since you don't see any explicit code, just a number that determines the copies.
Note that the copy node next to this on the left, does precisely the same thing, except we have turned off transform cummulative and added $CY to specify the copy number.
foreach loop - this node is a bit more obvious - it loops like a loop (although a bit weird with the counter in the foreach_end1 node, however the concept is familar in that when we use a "meta" node we can access the counter (iterator) and use it to place the object.
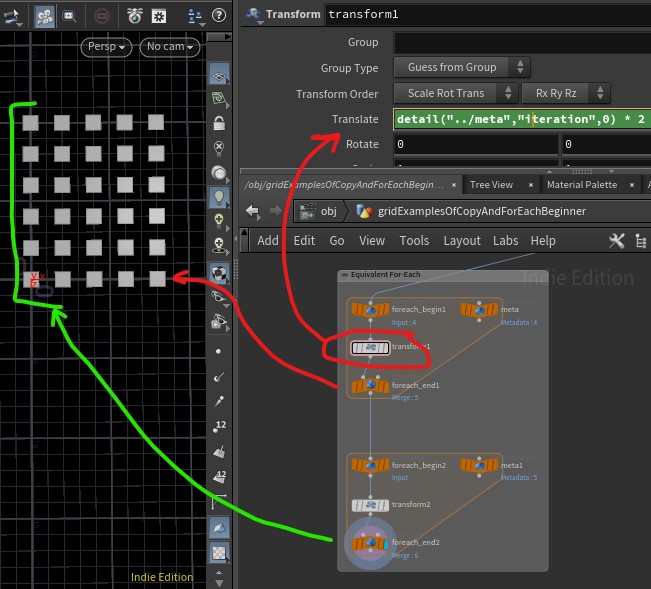
The expression in the transform node that is performed is detail("../meta","iteration",0) * 2
The is like saying the copy number or iterator times the distance, so again we have for a row, the first copied 0 units, 1 x 2, 2 x 3, and so on
Then the second for each copies the rows 6 times. You can see this by stepping down the network (clicking the blue display flag down the network to trace your steps (history is all there).
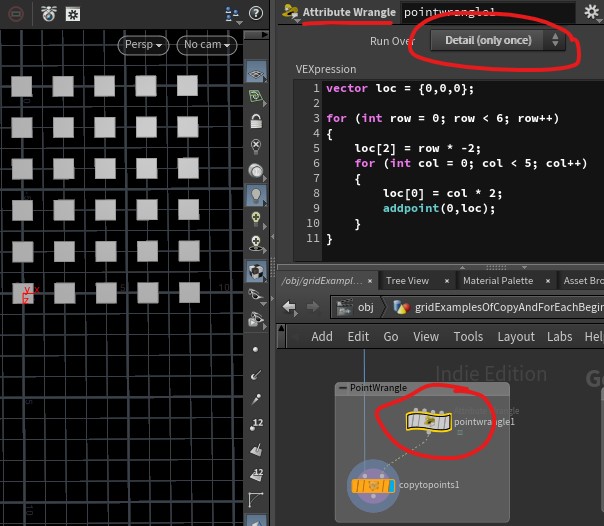
pointwrangle - wrangle nodes, also called attribute wrangles, can create the point positions in much the same way, and then we use a copy to points. This looks similar to your coding class, particularly if you are coming from processing/java/C#/C++ or any C-like programming language. This language is called vex. To be exact, it is a vex snippet. (I can talk more about the history of both these languages another time). This is what I can an explicit loop. It is obvious from the syntax that there is a loop structure, indeed a nested loop. Note: To create points, the point wrangle must be set to Detail(only once) which means it executes the code once.
That example is in the Advanced container and is not required for beginner users.
python - similar to what you did in your programming class, you can use python and it looks very similar to the pointwrangle node - same idea, same algorithm, different syntax.

copy to points - in our case, copy to points could also be used by creating a grid of appropriate size and spacing (rows/cols) and using that as the source of the points to be copied to.
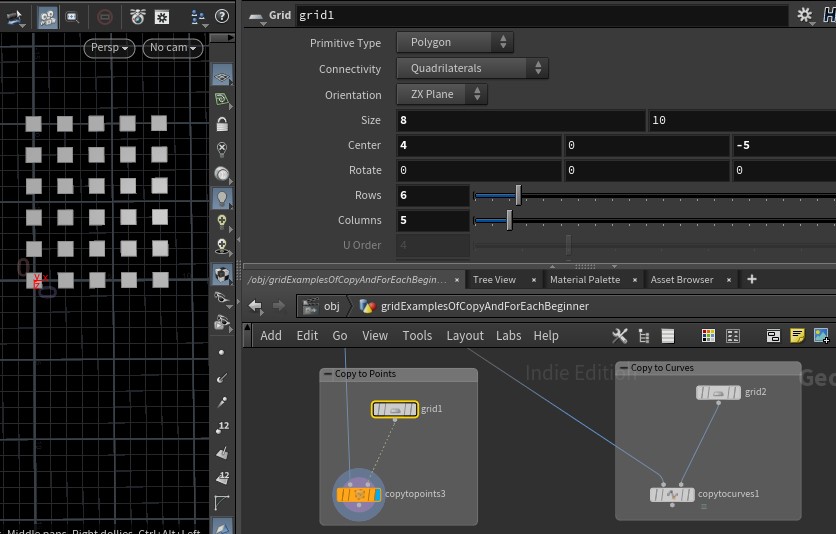
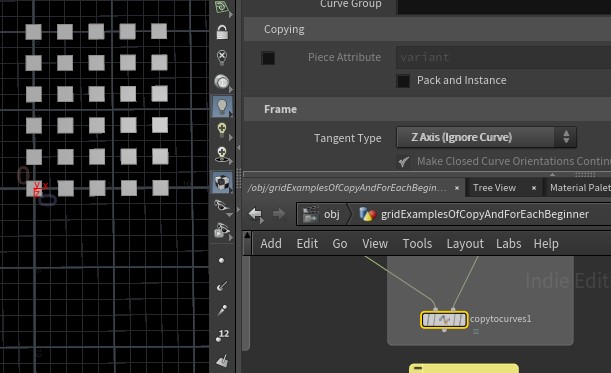
copy to curves - this node was introduced to more easily deal with copying geometry to curves and using the curve tangent information to orient that geometry. In this case, we simply set the Tangent Type to Z Axis (Ignore Curve) and we get the same result as copy to points with our grid.